This post is part of a new segment where I recreate the recipes of those around me. I am forever curious about the homecooked food my friends and family subsist on and nourish themselves with – what are their lazy day go-to meals? What do they turn to when they feel like making a splash in the kitchen? What is their definition of comfort food? I will explore these questions through my histamine-intolerant lens, but will include the original recipes for those who don’t get bloated off everything.
What: An amazingly simple and delicious dinner to prepare on a weeknight, as long as you remember to marinate the chicken the night before
Who: Sk8er Girl i.e. Ching-Ling Ho
Bloat score: 0 – Living the dream
At the beginning of iso, I bought a tub of miso paste and have been using it in these crispy miso chickpea bowls drizzled with this quick ginger garlic miso tahini dressing, courtesy of Minimalist Baker, that I make whenever I’m running low on fresh ingredients. Miso is, strictly speaking, a prohibited ingredient on the low-histamine list but I’ve never faced adverse affects from eating it and have added it to my regular go-to ingredients.
I’m so glad to have found another use for it through this recipe that Sk8er Girl draws on often, whose nickname was inspired by everyone’s favourite teenage angst queen Avril Lavigne. Sk8er Girl and I met when I was 8 when she used to bully me for my weird-sounding Aussie accent and ineptitude at speaking Malay but it only took a few months for us to turn into fast best friends, although our interests remain shockingly disparate – she enjoys long-boarding up and down hills and whipping up gourmet dishes like duck confit and pan fried ling cod while I love nothing more than napping and…that’s it.
This is thankfully one of the simpler recipes that Sk8er Girl recreates in her Vancouver kitchen, and I seized the opportunity to make it, being a big fan of both miso and chicken. She obtained it from Just One Cookbook, the food blog of San Francisco-based Japanese home cook Namiko Chen but in classic Sk8er Girl style, chooses to eyeball the quantity of ingredients used instead of following the recipe (I did no such thing). There are a number of moving parts to this recipe but it’s incredibly easy and requires few ingredients.
“I make it quite often, nearly every other week. It’s super easy to make so it’s a convenient weeknight meal. Just pair it with a vegie dish and that’s it.
“Don’t burn the chicken. I did it the first time.”
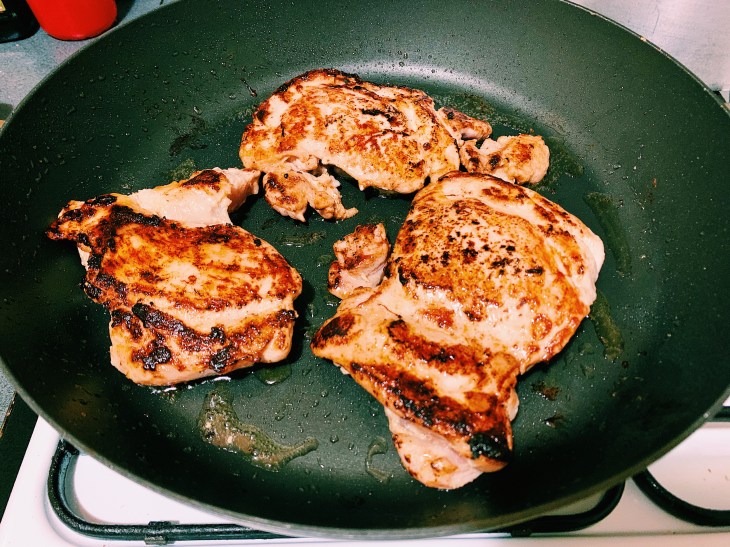
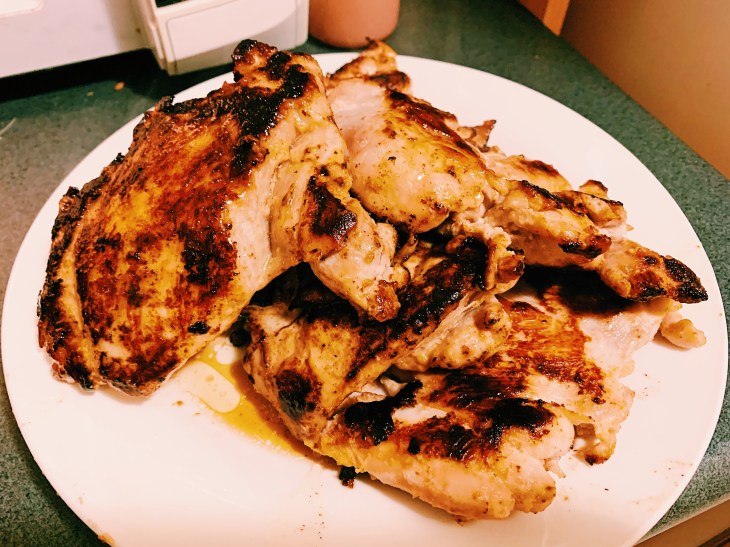
This is the main thing to keep an eye on, both when making the miso sauce and frying the chicken. Miso burns very easily, and I may have um ruined my pan while making the sauce (it was an extremely old pan). But my chicken didn’t burn so I’m still counting it as a win!!
Sk8er Girl cooks her chicken in a skillet and said she’d teach me her oven technique if I was successful, but I’ll have to buy a skillet first before she imparts her wisdom to me. In the absence of a skillet, she advises using a non-stick pan, which is what I used, so the skin doesn’t stick to the pan
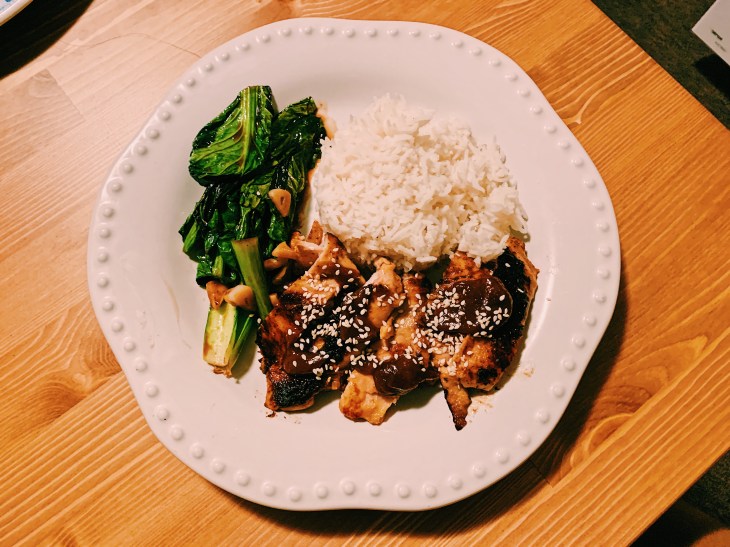
I deviated in a few ways from the original recipe, but it still tasted great, which goes to show how foolproof this recipe really is. Firstly, I didn’t buy skin-on chicken thigh fillets and they still turned out great – the sweet miso caused the chicken to char nicely on the pan, and my chicken thankfully didn’t burn (the key is low heat!). I also misread the instructions and marinated my chicken in store-bought miso instead of the housemade sauce that Nami makes with store-bought miso, but the chicken still tasted amazingly umami. I’ll include Nami’s instructions for the housemade sauce below because it’s so simple to make – I drizzled it over the chicken in the end.
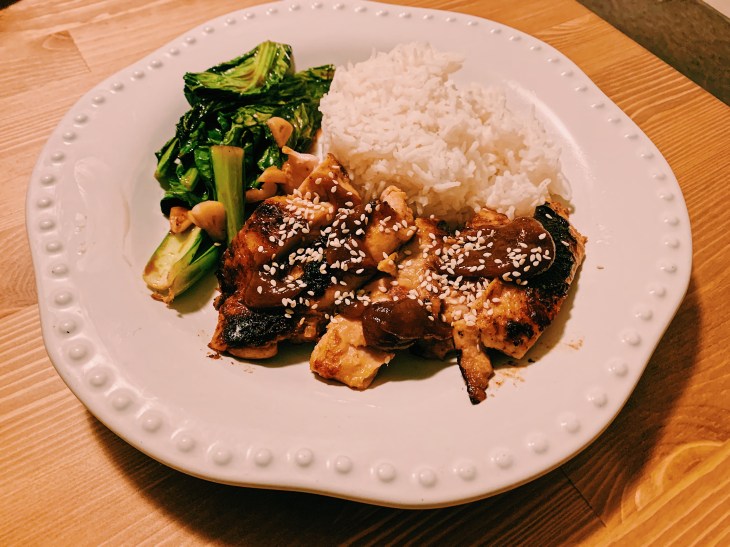
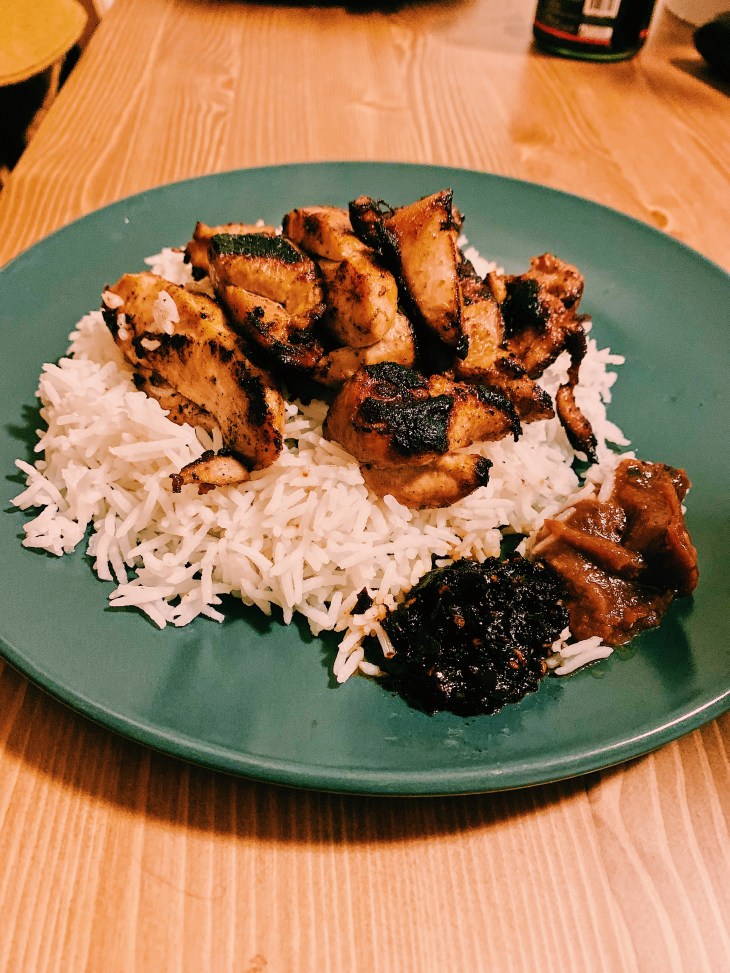
I made Marion Kitchen’s easy Asian greens and they were the perfect accompaniment to the chicken. The next day, I’d run out of greens and had the chicken by itself on rice – still tasty, though maybe not as nutritious. Eat it however you want, though steaming hot (preferably white) rice is a must.
I’ve included Sk8er Girl’s original instructions below, with my additional comments in italics.
Miso chicken (a recipe by Ching-Ling Ho based on a Just One Cookbook recipe)
Serves: 4–6
All-purpose miso sauce
1 cup miso (Nami uses red miso, as did I)
1 cup mirin
1/2 cup sake (I used Chinese cooking wine/Shaoxing wine instead after reading that it’s a handy substitute on Recipe Tin Eats)
2 tablespoons sugar
Miso chicken
5 boneless skin-on chicken thighs (I bought boneless skinless chicken thighs and it was fine)
5 tablespoons all-purpose miso sauce (1 tablespoon for each chicken thigh)
1 tablespoon cooking oil
1 teaspoon white sesame seeds, toasted (I didn’t toast mine because, laziness)
1 spring onion, chopped
Drizzling sauce
5 tablespoons all-purpose miso sauce (again, 1 tablespoon for each chicken thigh)
5 tablespoons water
Gather all the ingredients for the all-purpose miso sauce in a small saucepan. Whisk all together and bring the sauce to boil over medium heat.
Once bubbling, reduce the heat to low and simmer for 20–30 minutes until thickened (even though my heat was on low, I still burnt my pan, so keep a close eye on it. Stay around during the simmering process to scrape the bottom of the pot and to keep stirring it.)
The all-purpose miso sauce is now ready to be used to marinate the chicken! You can store the leftover sauce in an airtight container in the fridge for up to 2 months.
Using the tip of a knife, prick the skin on your chicken thighs so the fat can render more easily. Thoroughly pat the chicken dry and place it in a zip-lock bag.
Add 5 tablespoons of the the all-purpose miso sauce and zip up the bag. Rub the chicken well from the outside so the miso sauce is distributed evenly. Let the chicken marinate in the all-purpose miso sauce in the fridge for 24 hours.
After 24 hours, remove the chicken from the fridge. Do your best to remove the miso sauce from the chicken with a paper towel and thoroughly pat the skin dry before you cook the chicken. Don’t worry about the flavours lost from removing the miso sauce – marinating the chicken for one day gives the chicken plenty of flavour. (Can’t emphasise the importance of removing the miso sauce as much as you can!)
In a large non-stick frying pan, add 1 tablespoon of oil and distribute evenly. Don’t turn on the heat yet.
Place the chicken skin-side down. Do not crowd the pan, and make sure there is some space in between so the chicken won’t end up steamed. (I fried mine in 2 batches.)
Turn on the heat to medium-low to medium. Sear the chicken thighs skin-side down in a hot frying pan undisturbed until the skin is well browned and crispy, which typically takes about 7 minutes. (I bought skinless chicken thighs, and it became more well-browned and crispy than I thought possible.)
DO NOT TOUCH the chicken for the next 7 minutes, except to occasionally press down with a spatula. Do not cover with a lid, but you can use a mesh guard if you have one.
After 7 minutes, slowly peek to see if the skin is nicely browned and the edges of the chicken have turned opaque. If so, flip and continue to cook the other side for about 5 minutes. If not, continue to cook undisturbed for a little longer until well browned. Continue to press down occasionally to get the surface nicely seared.
Once both sides are nicely browned, remove from the pan and place the chicken on a chopping board/plate.
Let it rest for 5 minutes and then cut into ½ strips.
To make the drizzling sauce, quickly wipe off the oil in the frying pan with a paper towel and add the all-purpose miso sauce. For 1 chicken thigh, you need 1 tablespoon all-purpose miso sauce and 1 tablespoon water so I used 5 of each. Bring the sauce to simmer and once it’s thickened, turn off the heat.
Serve this miso chicken with a side vegetable over steamed rice. Drizzle the sauce over and sprinkle sesame seeds and chopped spring onion.